

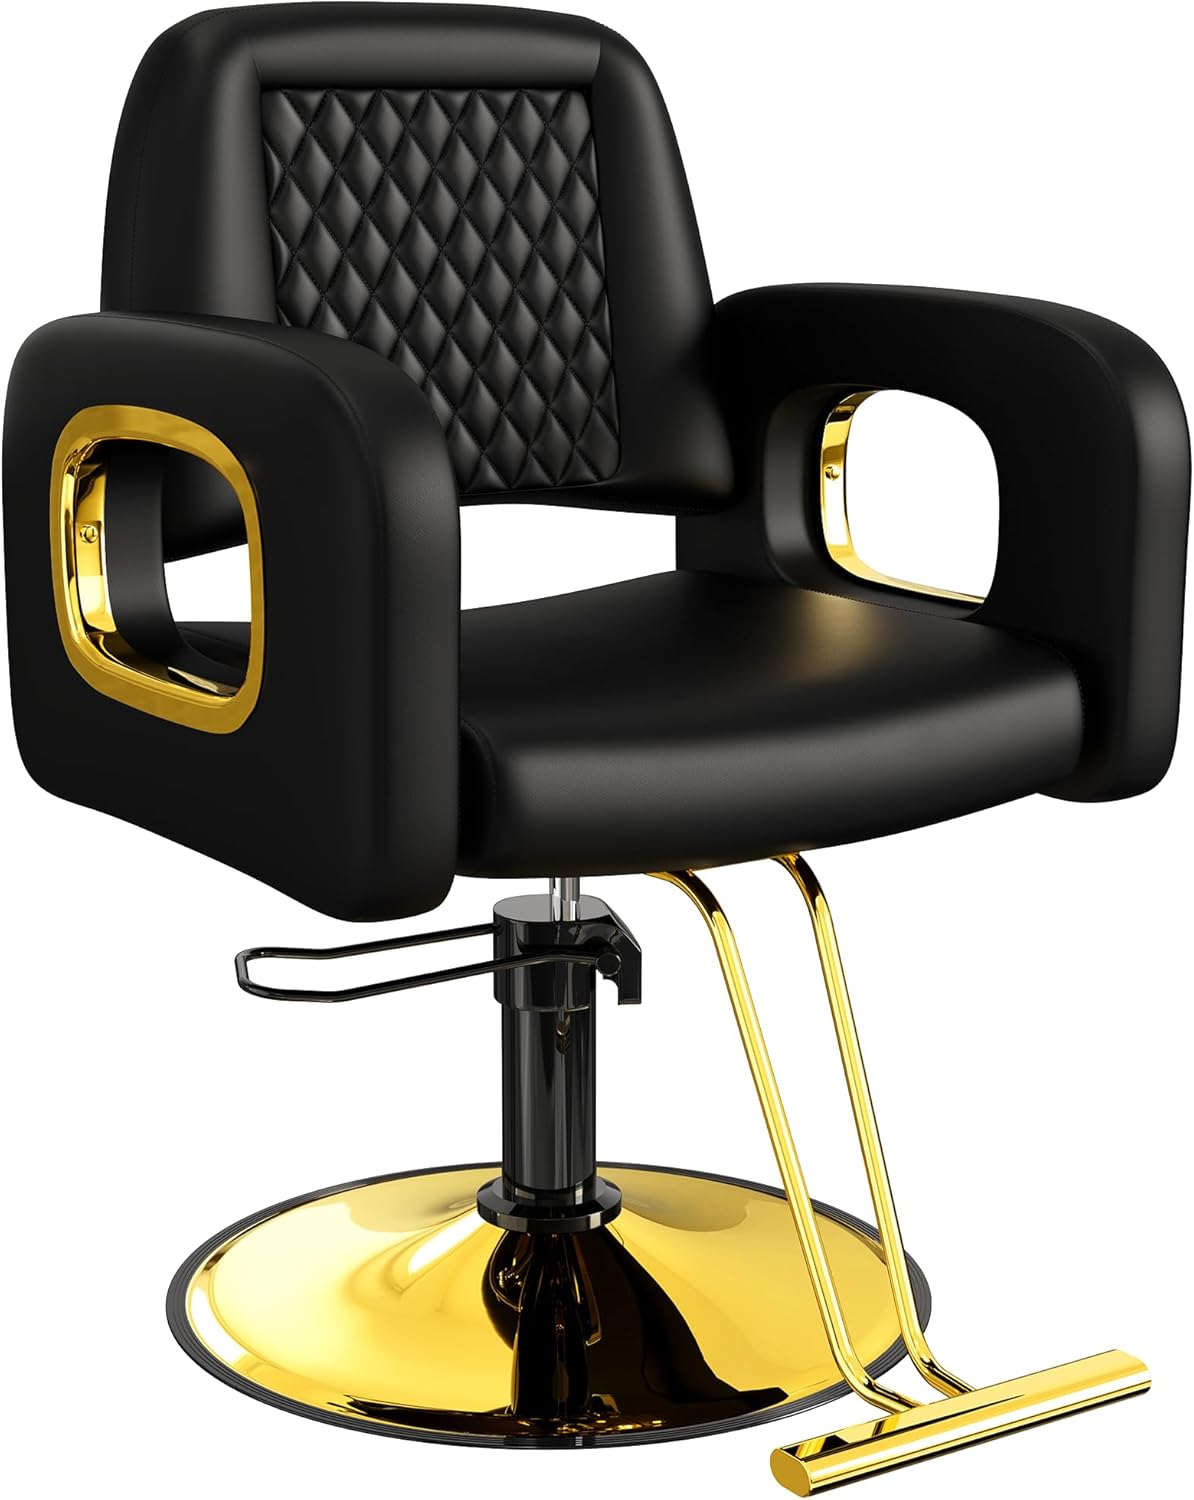
Baasha Professional Salon Chair for Hair Stylist, All Black Heavy Duty Hydraulic Barber Equipment with 330lbs Capacity, 580mm Large Base 360° Swivel Memory Foam Beauty Hair Styling Chairs
Product details
| Management number | 228092613 | Release Date | 2026/05/31 | List Price | $76.00 | Model Number | 228092613 | ||
|---|---|---|---|---|---|---|---|---|---|
| Category | |||||||||
- Built for High-Traffic Professional Salons: Engineered for busy stylists, this salon chair features a reinforced heavy-duty hydraulic pump and an extra-large 580mm anti-tip base. It safely supports up to 330lbs, ensuring absolute stability when adjusting heights for diverse clients during complex hair transformations or bridal styling.
- Ultimate Comfort for Long Coloring Sessions: Perfect for extended chemical treatments or hair coloring, the seat is cushioned with high-density memory foam that retains its shape. Your clients will enjoy a cloud-like experience in your boutique studio, while the ergonomic curved backrest provides essential support to prevent fatigue during hours-long appointment
- Effortless Maintenance for Fast-Paced Barbershops: Ideal for messy haircutting and bleaching tasks, our breathable handmade PU leather is water-resistant. Hair slippings wipe off effortlessly, maintaining a pristine, professional workstation look even after a full day of fades and trims in a modern barbershop environment.
- Smooth 360° Swivel for Intricate Styling: Enhance your precision in home salons or tattoo parlors with the seamless 360-degree rotation. This allows stylists to reach every angle without strain, while the responsive foot pump provides smooth height adjustments, making it the ultimate workstation upgrade for detailed braiding or delicate facial treatments.
- Sleek Modern Upgrade for Beauty Salon: A sophisticated all-black design that fits any contemporary salon decor or newly opened studio. The chair arrives with clear instructions for simple 4-step assembly, allowing you to quickly refresh your space and provide an upscale, luxurious atmosphere that impresses every client from the moment they sit down.


| ASIN | B0FYDXY8K7 |
|---|---|
| Color | All Black |
| Shape | Rectangular, Round, Semicircular, Square |
| Theme | Industrial, Modern, Professional |
| Pattern | Solid |
| Tilting | No |
| Arm Style | Pillow-Top |
| Room Type | Beauty salon, Hair salon, Mobile salon |
| Arm Height | 26.8 Inches |
| Back Style | Open Back |
| Brand Name | Baasha |
| Model Name | BS-Styling Chair |
| Seat Depth | 19.7 inches |
| Style Name | 222 |
| Unit Count | 1.0 Count |
| Fabric Type | Pu Leather |
| Form Factor | Salon Chair |
| Is Foldable | No |
| Item Weight | 50 Pounds |
| Finish Types | Painted |
| Manufacturer | Baasha |
| Model Number | BS-Styling Chair |
| Cushion Style | Soft, Comfortable, Wide |
| Fill Material | Memory Foam |
| Material Type | Leather, Memory Foam, Stainless Steel |
| Seat Material | Memory Foam, Leather |
| Is Customizable | No |
| Item Dimensions | 25 x 22 x 36 inches |
| Furniture Finish | Leather |
| Required Assembly | Yes |
| Additional Features | 360 Swivel, Heavy Duty, Hydraulic, Stain Resistant, Upholstered Leather, Wide Seat, Ergonomic |
| Frame Material Type | Stainless Steel |
| Included Components | 1*Salon Chair, 1* Instruction, 1*Tools |
| Indoor Outdoor Usage | Indoor |
| Age Range Description | Adult, Older Adult, Teen |
| Surface Recommendation | Hard Floor |
| Upholstery Fabric Type | Leather |
| Furniture Base Movement | Swivel |
| Manufacturer Part Number | 97 |
| Item Dimensions D x W x H | 25"D x 22"W x 36"H |
| Product Care Instructions | Wipe Clean |
| Seat Back Interior Height | 16.5 Inches |
| Recommended Uses For Product | Hair Extensions, Hair braiding, Hair coloring, Hair cutting, Hair styling, Make up, Tattooing |
| Maximum Weight Recommendation | 330 Pounds |
| Assembly Instructions Description | Phase 1: Assembling the Base and Pump Prepare the Pump: Turn the hydraulic pump (C) upside down on a flat surface. Attach the Base: Place the circular base (H) onto the bottom of the pump. Secure: Align the holes and use the wrench (D) to secure the base using the 6 black screws (F) and 6 washers (G). Pro-Tip: Tighten these screws firmly. If they are loose, the chair will rock or wobble after installation. Position: Flip the base and pump assembly back to the upright position so it stands on the floor. Phase 2: Attaching the Backrest and Footrest Install the Backrest: Remove the 4 pre-installed screws from the back of the backrest (B). Rotate the seat (A) and place it on its side or an elevated surface to access the attachment points. Align the backrest onto the seat frame. Insert the 4 screws through the holes. Important: Do not tighten the screws fully until all 4 are inserted and the backrest is aligned straight. Once aligned, tighten them all securely. Install the Footrest: Remove the 2 pre-installed screws from the bottom front of the seat (A). Align the screw holes of the footrest (I) with the bottom of the seat. Insert and tighten the 2 screws to secure the footrest. Phase 3: Final Assembly Join Seat to Pump: This step is best performed by two people. One person should lift the completed seat assembly while the other guides the pump's piston into the mounting hole under the seat. Set the Connection: Once the seat is placed on the pump, have a person sit on the chair for a short period. The weight ensures a secure, pressurized connection between the pump and the seat. Chair Operation Guide 1. Adjusting Height To Raise: Repeatedly press the foot pedal halfway down. The hydraulic action will lift the chair. To Lower: Press the foot pedal all the way down and hold it. The chair will slowly descend using the client's weight. 2. Swivel & Locking Feature To Unlock (360° Swivel): Press the foot pedal downward while rotating the chair. This releases the internal lock. To Lock: Lift the foot pedal upward with your toe. This engages the internal oil pump lock, preventing the chair from rotating during a haircut. 3. Safety: Avoiding Tipping To prevent the chair from tipping forward when a client is exiting: The Wrong Way: Stepping on the footrest while the chair is at its highest position can cause the chair to tip forward. The Correct Way: Always lower the chair to its lowest position before the client stands up. This ensures the support rod is close to the ground, providing maximum stability as they step off. |


Bestseller ranking
Salon & Spa Chairs


Customers who viewed this product also viewed
Magazine Holders


Correction of product information
If you notice any omissions or errors in the product information on this page, please use the correction request form below.
Correction Request Form